[ 설치 환경 ]
| OS | Centos 7.6 |
| Apache 2.4 | |
| PHP 7.3 | |
| MariaDB 10.3 |
|
3. Apache 설치
Apache 설치 링크 http://archive.apache.org/dist/httpd/
Index of /dist/httpd
Index of /dist/httpd Apache HTTP Server Source Code Distributions This download page includes only the sources to compile and build Apache yourself with the proper tools. Download the precompiled distribution for your platform from binaries/. Important Not
archive.apache.org
apr 설치 링크 archive.apache.org/dist/apr/
Index of /dist/apr
This downloads page includes only the sources to compile and build APR projects, using the proper tools. All of the release distribution packages have been digitally signed (using PGP or GPG) by the ASF committers that constructed them. There will be an ac
archive.apache.org

3-1. 관련 모듈 다운로드 및 설치
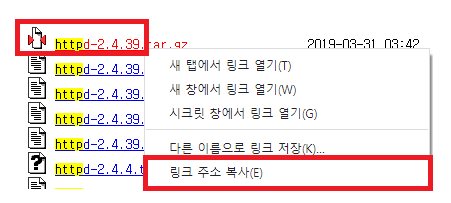
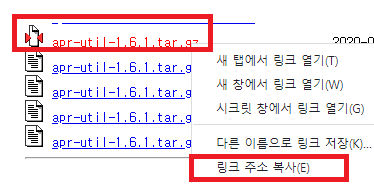
wget 뒤에 해당 링크 주소 복사하시면 됩니다.
해당 링크주소는 시간이 지나면 변하기 때문에 직접 들어가서 다운로드하시는 걸 추천드립니다.
cd /root/src
wget http://archive.apache.org/dist/httpd/httpd-2.4.39.tar.gz
tar xvfz httpd-2.4.39.tar.gz
cd /root/src/httpd-2.4.39/srclib
wget https://archive.apache.org/dist/apr/apr-1.7.0.tar.gz
tar xvfz apr-1.7.0.tar.gz
wget https://archive.apache.org/dist/apr/apr-util-1.6.1.tar.gz
tar xvfz apr-util-1.6.1.tar.gz
mv apr-1.7.0 apr; mv apr-util-1.6.1 apr-util
cd /root/src/httpd-2.4.39
arp이란, Apache가 설치된 플랫폼(OS)에 관계 없이 일정한 동작을 하기 위해 필요한 라이브러리입니다.
apr-utiliy : apr의 유틸리티 프로그램
3-2. 아파치 컴파일
./configure --prefix=/opt/apache --with-mpm=prefork --enable-headers=shared --enable-rewrite=shared --enable-mods-shared=most --with-ssl --enable-ssl --with-included-apr --with-included-apr-util --with-included-apr-iconv위에 컴파일 내용은 아래의 내용 참고 부탁드립니다.
--prefix= [아파치 설치 위치]
--with-mpm=MPM (Prefork방식 혹은 Worker)
서버의 동작방식을 선택한다 정확한 한 가지 다중처리 모듈만 선택해야 되고 선택하지 않으면 사용하는 운영체제의 기본 MPM를 사용한다.
사용할 수 있는 MPM에는 prefork, worker가 있다.
리눅스에서 멀티 프로세스에 관련된 모듈(MPM)에는 대표적으로 worker / prefork 두 가지가 있습니다.
Perfork 방식 : 한 자식프로세스당 쓰레드를 사용하는 방법
기본 사용 메모리가 Worker보다 높으며 프로세스 간 메모리를 공유하지 않는 독립 형태이므로 안정적이며 아파치 컴파일 시 옵션 추가하지 않을 경우 기본으로 이 모듈로 동작합니다.
Worker 방식 : 한 자식프로세스당 여러 개의 쓰레드를 사용하는 방법
기본 사용 메모리는 prefork보다 낮으며 쓰레드간의 메로리를 서로 공유한다 동시접속자가 많은 사이트에 적합합니다.
--enable-rewrite = mod_rewrite가 제공하는 규칙기반 URL 조작 기능을 사용한다.
--enable-so = mod_so가 제공하는 DSO 기능을 사용한다
--enable-mods-shared 옵션을 사용하면 자동으로 이 모듈을 포함된다.
--enable-ssl = mod_ssl이 제공하는 SSL/TLS 기능을 사용한다
--includedir=DIR = C 헤더파일을 DIR에 설치한다. includedir의 기본값은 EPREFIX/include이다.
--enable-headers = mod_headers가 제공하는 HTTP 헤더 조절 기능을 사용한다.
3-3. Apache 설치
make -j `grep processor /proc/cpuinfo | wc -l`; make install위에 내용은 아래의 내용 참고 부탁드립니다.
make는 소스를 컴파일하는 명령어입니다.
컴파일이란 것은 소스파일을 사용자가 실행 가능한 파일로 만들어 주는 과정입니다.
make install은 make를 통해 만들어진 설치 파일(setup)을 설치를 하는 과정입니다.
빠른 설치를 위해, CPU 사용을 MySQL사용에 집중적으로 설치할수 있도록 해당 명령어를 이용했습니다.
-j : 옵션의 경우 job을 분산시킨다
CPU 코어가 4개라면 , 한 번에 수행할수 있는 명령을 -J4으로 지정하여, 프로세스가 4개가 생성되어 병렬로 수행합니다. 명령수는 프로세스수로 정의
3-4. httpd.conf 수정
httpd.conf 파일이 열리면 ServerName 부분을 찾아 주석을 제거하고 사용할 서버명 또는 IP 입력
vi /opt/apache/conf/httpd.conf
ServerName localhost  // 이렇게 입력하셔도 됩니다.
ServerName IP:80 // 이렇게 입력하셔도 됩니다.
3-5. 방화벽 설정
Centos 7 기본 방화벽은 firewall 입니다.
아파치 웹서버를 외부에서 웹브라우저로 접속하기 위해서는 TCP 80 포트를 방화벽에서 열어줘야만 한다.
# 추가
firewall-cmd --permanent --zone=public --add-port=80/tcp

# 적용
firewall-cmd --reload

# 확인
firewall-cmd --list-all
public (active)
  target: default
  icmp-block-inversion: no
  interfaces: eno1
  sources:
  services: ssh dhcpv6-client
  ports: 80/tcp
  protocols:
  masquerade: no
  forward-ports:
  source-ports:
  icmp-blocks:
  rich rules:
3-6. Apache 실행 및 완료 확인
/opt/apache/bin/apachectl start3-7. Apache 버전 확인
/opt/apache/bin/apachectl -v
Server version: Apache/2.4.39 (Unix)
Server built:   Jan 22 2021 07:20:32
여기까지 설정했다면 Apache 웹서버 설치가 완료되었습니다.
이제 브라우저를 실행해 주소창에 IP를 입력하시면 It works!라는 텍스트 문구가 나올겁니다.
이로서, Apache 설치 완료되었습니다.
다음장에는 이어서 PHP 설치 진행하겠습니다.

'IT > Linux' 카테고리의 다른 글
| Apache + tomcat 7 설치 및 연동 (2) (0) | 2021.01.23 |
|---|---|
| Apache + tomcat 7 설치 및 연동 (1) (0) | 2021.01.23 |
| APM 이란? (1) | 2021.01.23 |
| APM ( Apache 2.4 + PHP 7.3 + MariaDB 10.3 )소스설치 (3) (5) | 2021.01.21 |
| APM ( Apache 2.4 + PHP 7.3 + MariaDB 10.3 )소스설치 (1) (1) | 2021.01.17 |


최근댓글